
How can we change the speed limit in console? In the manual it is mentioned that the speed override should be set to 100%. Is that lay-up speed? What are the minimum & maximum lay-up speed for our AFP machine. Currently by changing HGT temperature & load I am trying to optimize the quality of fabricated samples; So, I was wondering to know that is it possible to change the lay-up speed?
How can we change the speed limit in console? In the manual it is mentioned that the speed override should be set to 100%. Is that lay-up speed? What are the minimum & maximum lay-up speed for our AFP machine. Currently by changing HGT temperature & load I am trying to optimize the quality of fabricated samples; So, I was wondering to know that is it possible to change the lay-up speed?
The desired processing speed can be set for each ply of material individually.
- Open the part in FPM, and press the “Configure” button:

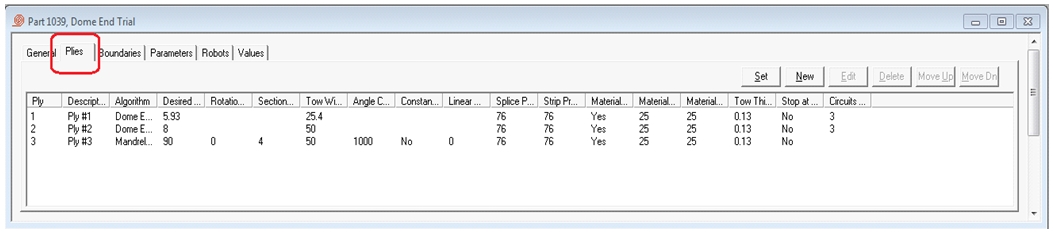
- This will open the main configuration window for the part. Go to the “Plies” tab. This will contain the chart with each of the plies listed out. The data that is contained in the chart can be customized for each user, so yours may look slightly different than what you see here:
- If you double-click on a ply, it will open a new window that has all of the parameters you can change for that ply, on the “Values” tab:
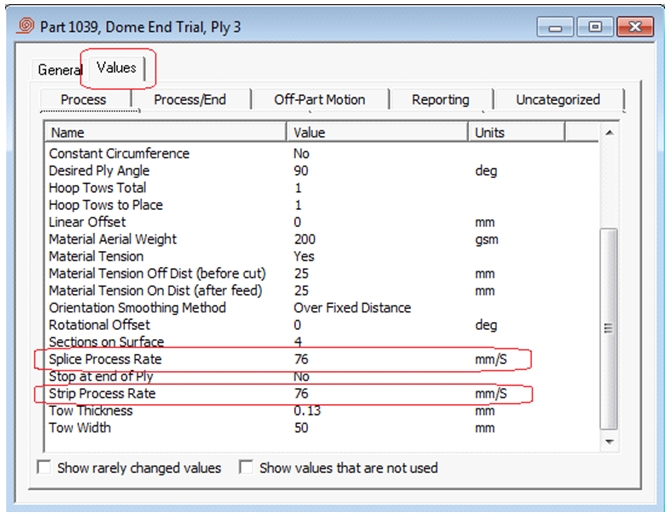
- The “Splice Process Rate” controls the speed at which the machine moves during the start (during material feeding) and the end (during material cutting) or each band. Typically I set this to around 75mm/sec as an upper limit for thermoset materials. For thermoplastic materials, I will typically set this to the same value as the “Strip Process Rate”. The reason for the (potentially) lower speed for the thermoset materials is that I have found these to be more fragile, and the sudden acceleration of the tape from the feed (pinch) rollers can damage the material. You are, of course, free to try out and experiment with higher values for this!
The “Strip Process Rate” controls the speed at which the machine moves during the rest of the band. This should be the majority of the time, as long as the strips are not very small.Note that sometimes the robot will slow down the motion of the machine due to limitations on the internal algorithms of the low level motion controller in the robot. These are often due to individual joint speed and acceleration rate limits.
If you want to customize the way the ply chart looks for you, you can do that:
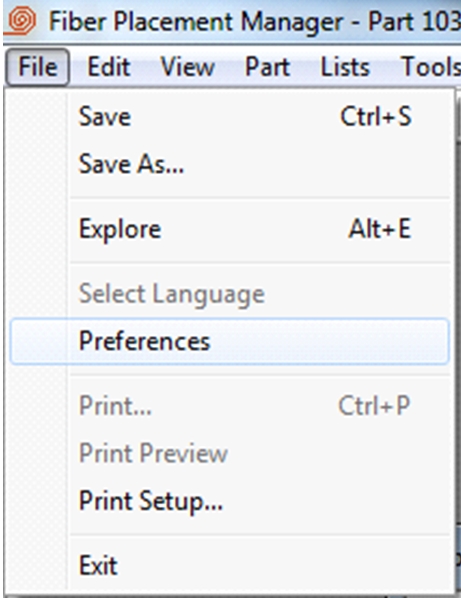
- From the main FPM menu, select “File” and then “Preferences”.
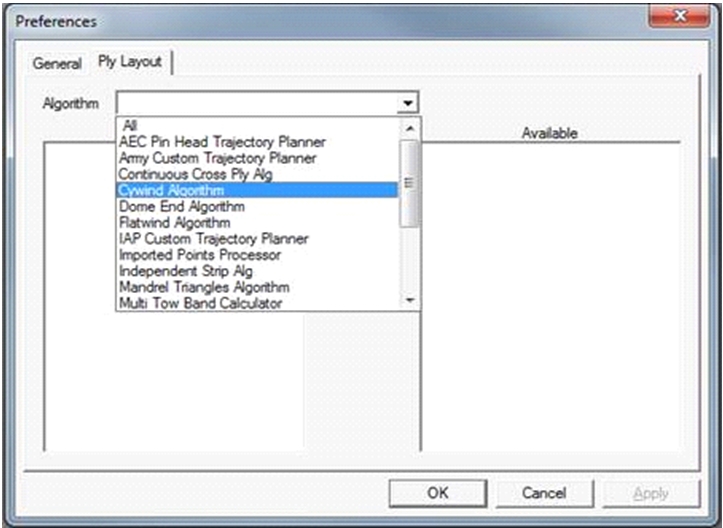
- This will open the Preferences window. Go to the “Ply Layout” tab.
- The parameters that are shown in the chart will depend on the particular algorithm that is being used to calculate the strips for each ply. So, start by selection the appropriate Algorithm from the pull down menu. In this case, I am selection the Cywind (cylinder) algorithm:
- The parameters in the left hand pane are the ones that are displayed in the chart. If you click on one of these, you can change the position of that column in the chart by selecting the “Move Up” or “Move Down” buttons. Remove the column from the chart by selecting the “Remove” button.

- The parameters in the right hand pane are all of the parameters available for the current algorithm. To add one of these as a new column in the chart, Click on the desired parameter and press the “Add” button.
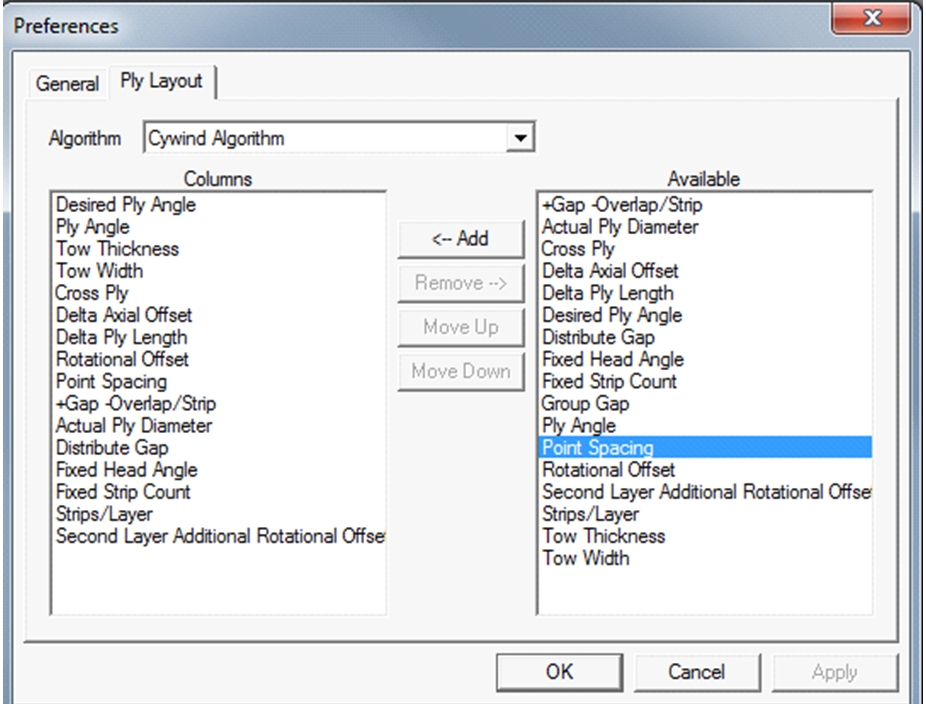
- Once you are finished making the changes you desire press the “OK” button.
- Note that one of the algorithms is labeled as “All”. The parameters selected here will be displayed in the chart regardless of what particular algorithm is being used for calculation of the ply.